
⇗
Who I am
I’m Dino Ciuffetti, a married man obsessed with IT, electronics, beer and music.

⇗
My Blog
The purpose of this blog is to share with everyone what happens to me that I consider important, but above all to share with myself and others working technical solutions that I have worked on.
- Building a UPS Monitoring Dashboard with Grafana, Telegraf, and InfluxDB
 Monitoring the health of your UPS (Uninterruptible Power Supply) is… Leggi tutto: Building a UPS Monitoring Dashboard with Grafana, Telegraf, and InfluxDB
 - New blog layout
 After ~ 15 years it’s time to upgrade my blog… Leggi tutto: New blog layout
 - TADO ™ unofficial REST API device code flow
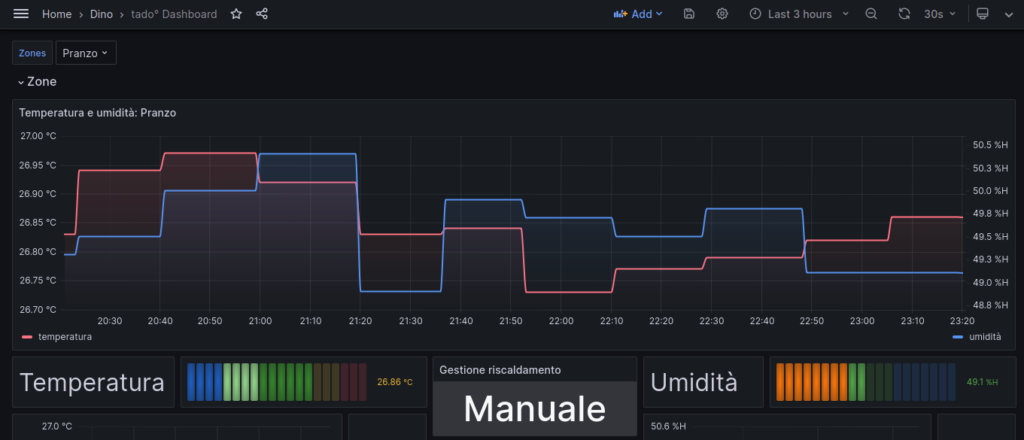 If you’re a developer working with Tado’s unofficial REST APIs,… Leggi tutto: TADO ™ unofficial REST API device code flow
 - Postgres extension for stock technical analysis
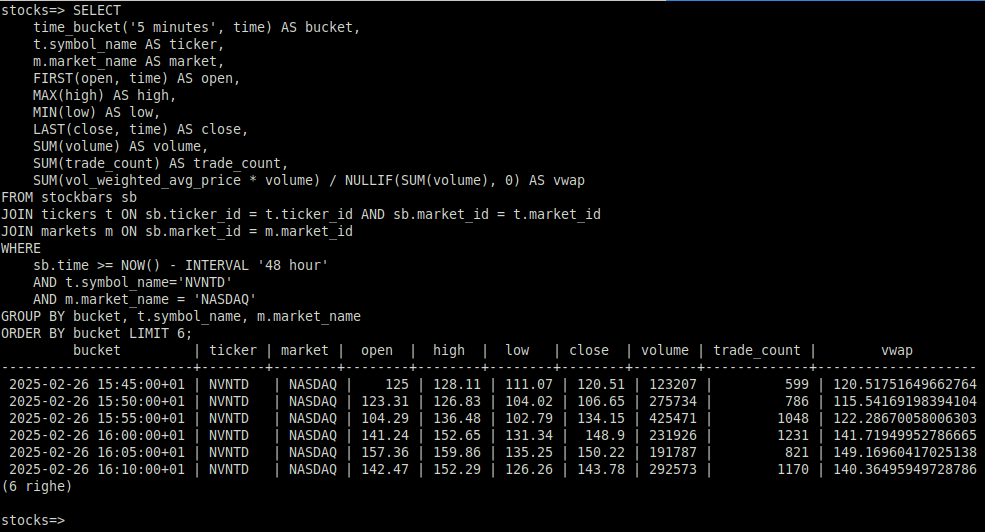 Ok, it’s been a while since I wrote anything here,… Leggi tutto: Postgres extension for stock technical analysis
 - Nothing new
 Nothing new except the year. Happy 2025!
 - 3 secrets for success at work
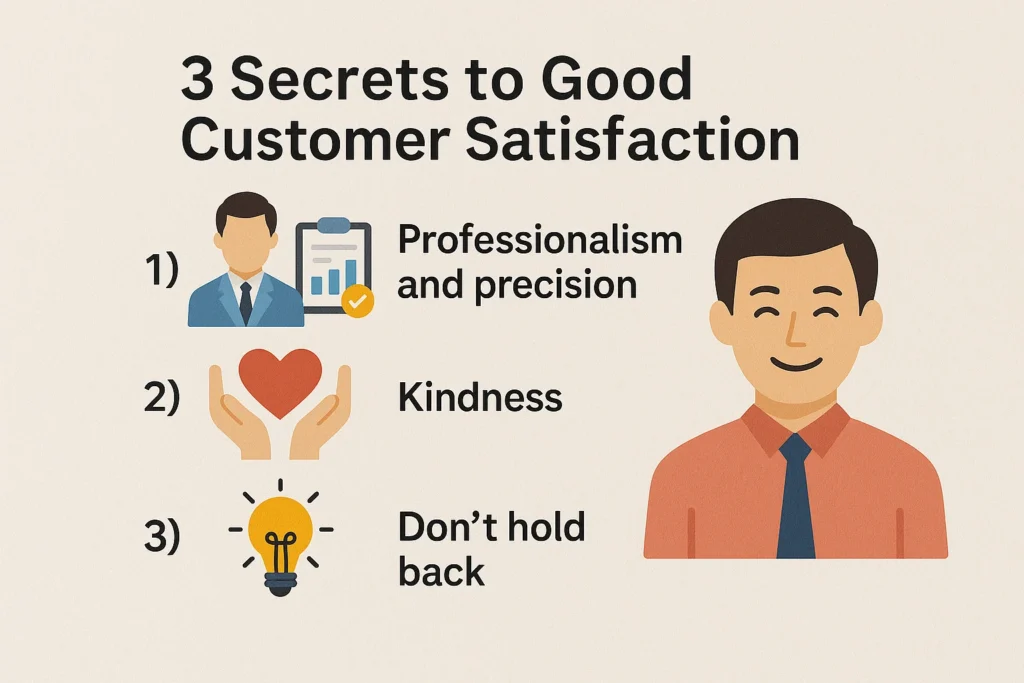 3 secrets to good customer satisfaction, teamwork or happy boss: